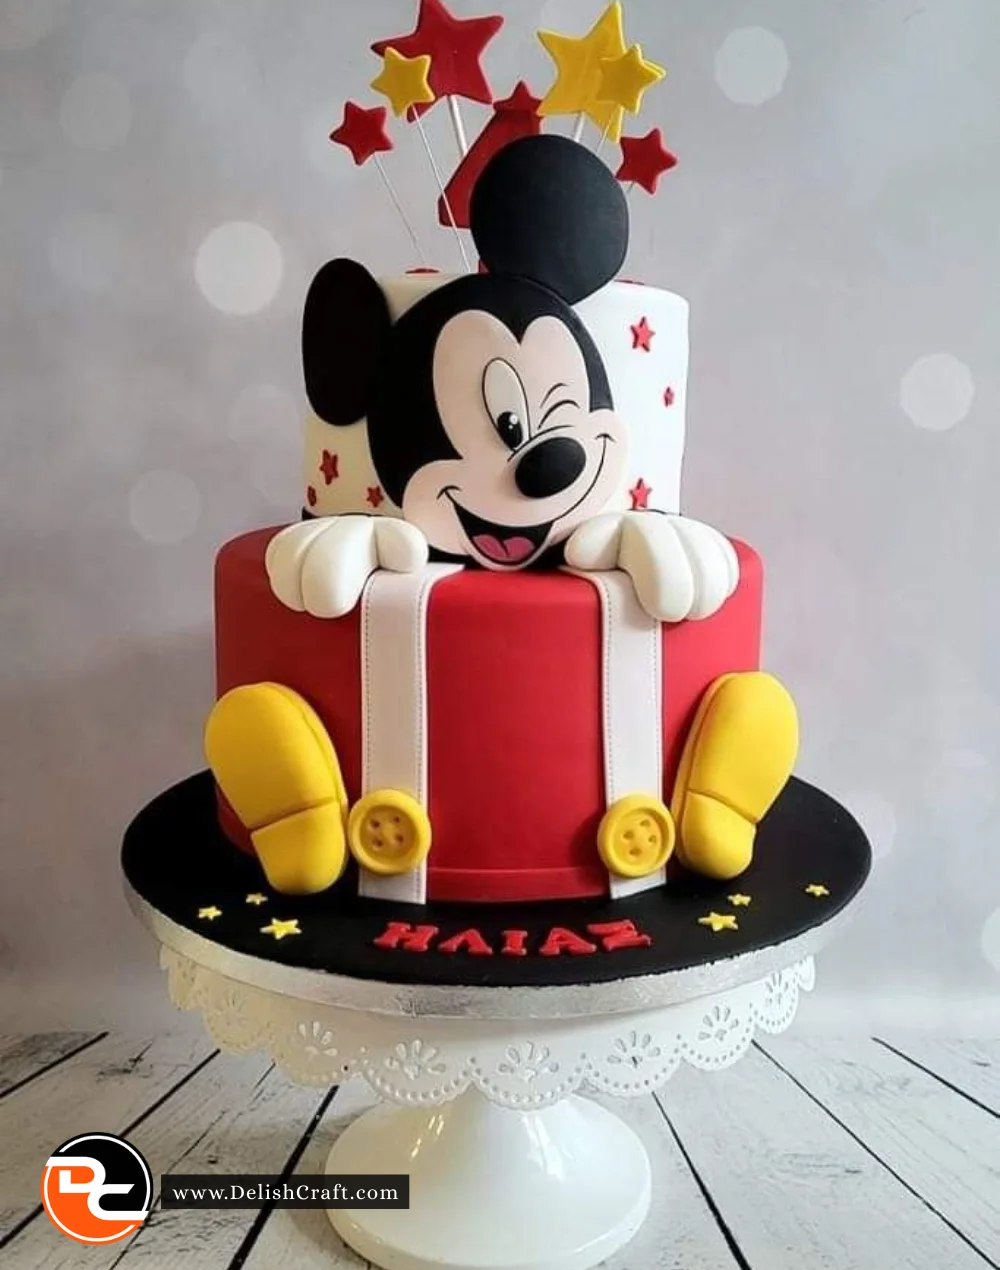
Mickey Mouse Cake
Ah, the delightful world of cakes! There’s something magical about baking—an alchemy of ingredients coming together to create something beautiful and delicious. Growing up, my kitchen was filled with the laughter of family and friends as we gathered around the table, excited to share our baking adventures. One cake that always brought that sense of joy and whimsy was the classic Mickey Mouse Cake. It’s not just a treat, but also a heartfelt experience that brings back memories of childhood and happiness.
Picture this: A beautifully crafted cake that resembles everyone’s favorite animated mouse. With a cheerful smile and chocolate chip eyes, it’s hard not to feel the nostalgia and joy this cake brings. Perfect for birthdays, celebrations, or simply to indulge that sweet tooth, the Mickey Mouse Cake is a fun project to undertake in the kitchen. Let’s dive into the nitty-gritty of crafting this delightful dessert!
Recipe Timing
- Prep Duration: 20 minutes
- Active Cooking: 30 minutes
- Total Duration: 1 hour 30 minutes
- Portion Size: Serves 10-12
- Complexity: Simple
Nutritional Recipe
- Calories per portion: Approximately 370
- Protein: 4g
- Carbs: 49g
- Fats: 18g
- Fiber: 1g
- Sugars: 29g
- Sodium: 300mg
Why You’ll Love This Mickey Mouse Cake
This Mickey Mouse Cake isn’t just delightful to look at; it’s equally delightful to taste! Each bite offers a rich chocolate flavor, balanced perfectly with the creamy buttercream icing. The cake is soft and moist, making it a hit with kids and adults alike. Plus, the interactive nature of assembling Mickey’s face and adding the decorations turns baking into a fun activity that you can enjoy with family or friends. Nothing brings people together like food, and this cake is the perfect centerpiece!
The Complete Cooking Journey
Let the cheerful baking adventure begin! Prepping and decorating this whimsical cake is a wonderful way to spend an afternoon in the kitchen. Follow along as we explore each stage of this baking journey.
Ingredients:
- 2 cups all-purpose flour
- 1 1/2 cups granulated sugar
- 1/2 cup unsweetened cocoa powder
- 1 cup unsalted butter, softened
- 4 large eggs
- 1 cup buttermilk
- 1 teaspoon vanilla extract
- 1 teaspoon baking powder
- 1/2 teaspoon baking soda
- 1/2 teaspoon salt
- Buttercream icing (for decoration)
- Chocolate chips (for eyes)
Method:
Step 1: Preheat the Oven
Preheat the oven to 350°F (175°C). Grease and flour two round cake pans and one smaller round cake pan for the ears.
Step 2: Cream the Butter and Sugar
In a large bowl, beat the softened butter and sugar together until light and fluffy. This creates the perfect base for our cake.
Step 3: Add the Eggs
Add the eggs one at a time, mixing well after each addition to ensure the batter is well-combined and smooth.
Step 4: Combine Wet Ingredients
Stir in the buttermilk and vanilla extract, mixing until everything is evenly combined and luxurious in texture.
Step 5: Sift Together Dry Ingredients
In another bowl, sift together the flour, cocoa powder, baking powder, baking soda, and salt. This step is crucial for removing lumps and ensuring a light, fluffy cake.
Step 6: Combine Mixtures
Gradually add the dry ingredients to the wet mixture, gently mixing until just combined. Avoid overmixing to keep the cake tender.
Step 7: Pour and Bake
Pour the batter into the prepared cake pans. Bake for 25-30 minutes or until a toothpick inserted comes out clean. Your kitchen will start to fill with a delicious aroma.
Step 8: Cool the Cakes
Let the cakes cool in the pans for 10 minutes before transferring them to wire racks to cool completely. This step is essential to prevent sogginess.
Step 9: Assemble Mickey Mouse
Once cooled, stack the larger cake for the head and add the smaller cakes for the ears using buttercream icing to secure them. This is where the magic starts to happen!
Step 10: Decorate
Use buttercream icing to cover the entire cake and secure chocolate chips for Mickey’s eyes. Let your creativity flow as you decorate!
Enjoy your Mickey Mouse Cake!
Serving Suggestions & Pairings
This cake can stand beautifully on its own, a glorious centerpiece for any gathering. Pair it with a glass of cold milk, hot chocolate, or, for the adults, a scoop of coffee ice cream to elevate the dessert experience. Cut into generous slices to share the joy!
Storage & Leftovers Guide
Store any leftovers in an airtight container at room temperature for up to 2 days. If you want to keep it longer, refrigerate it for up to a week. To enjoy it again, bring it to room temperature before serving.
Kitchen Wisdom & Success Tips
- Use high-quality cocoa powder for a deeper chocolate flavor.
- Ensure all ingredients are at room temperature for better mixing.
- For a festive touch, add colorful sprinkles or themed decorations around the cake.
Flavor Variations & Adaptations
Want to customize your cake? Try substituting half the cocoa powder with different flavored extracts, such as almond or hazelnut, for a unique twist. You could also switch the buttercream for cream cheese frosting for a tangy flavor profile.
Reader Questions & Solutions
-
Can I use a gluten-free flour blend?
Yes! Substitute the all-purpose flour with a gluten-free blend. Just ensure it has a binding agent. -
What can I use instead of buttermilk?
Mix 1 cup of milk with a tablespoon of white vinegar or lemon juice and let it sit for 5-10 minutes before using. -
How do I prevent my cake from sinking?
Make sure your leavening agents (baking powder and baking soda) are fresh, and avoid opening the oven door while baking until it’s close to being done. -
Can I freeze the cake?
Absolutely! Wrap the layers in plastic wrap and aluminum foil, then freeze. Thaw in the fridge before decorating or serving. -
What if I want to make it a chocolate chip cake instead?
Simply mix in a cup of chocolate chips into the batter before pouring it into the pans.
Wrapping Up
Baking a Mickey Mouse Cake is not just about the end product—it’s about the joy, laughter, and memories created in the kitchen. The cheerful decoration and rich chocolate flavor will surely delight everyone around the table. So gather your loved ones, don your aprons, and embark on this delightful baking adventure! Happy baking!
Print
Mickey Mouse Cake
- Total Time: 90 minutes
- Yield: 10-12 servings 1x
- Diet: Vegetarian
Description
A delightful chocolate cake resembling Mickey Mouse, perfect for birthdays and celebrations.
Ingredients
- 2 cups all-purpose flour
- 1 1/2 cups granulated sugar
- 1/2 cup unsweetened cocoa powder
- 1 cup unsalted butter, softened
- 4 large eggs
- 1 cup buttermilk
- 1 teaspoon vanilla extract
- 1 teaspoon baking powder
- 1/2 teaspoon baking soda
- 1/2 teaspoon salt
- Buttercream icing (for decoration)
- Chocolate chips (for eyes)
Instructions
- Preheat the oven to 350°F (175°C). Grease and flour two round cake pans and one smaller round cake pan for the ears.
- In a large bowl, beat the softened butter and sugar together until light and fluffy.
- Add the eggs one at a time, mixing well after each addition.
- Stir in the buttermilk and vanilla extract until evenly combined.
- In another bowl, sift together the flour, cocoa powder, baking powder, baking soda, and salt.
- Gradually add the dry ingredients to the wet mixture, mixing until just combined.
- Pour the batter into the prepared cake pans and bake for 25-30 minutes.
- Let the cakes cool in the pans for 10 minutes before transferring to wire racks to cool completely.
- Once cooled, stack the larger cake for the head and add the smaller cakes for the ears using buttercream icing to secure them.
- Use buttercream icing to cover the entire cake and secure chocolate chips for Mickey’s eyes. Decorate as desired!
Notes
Use high-quality cocoa powder for a deeper chocolate flavor. For a unique twist, substitute half the cocoa powder with flavored extracts.
- Prep Time: 20 minutes
- Cook Time: 30 minutes
- Category: Dessert
- Method: Baking
- Cuisine: American
Nutrition
- Serving Size: 1 serving
- Calories: 370
- Sugar: 29g
- Sodium: 300mg
- Fat: 18g
- Saturated Fat: 10g
- Unsaturated Fat: 6g
- Trans Fat: 0g
- Carbohydrates: 49g
- Fiber: 1g
- Protein: 4g
- Cholesterol: 80mg