Red Velvet Cake
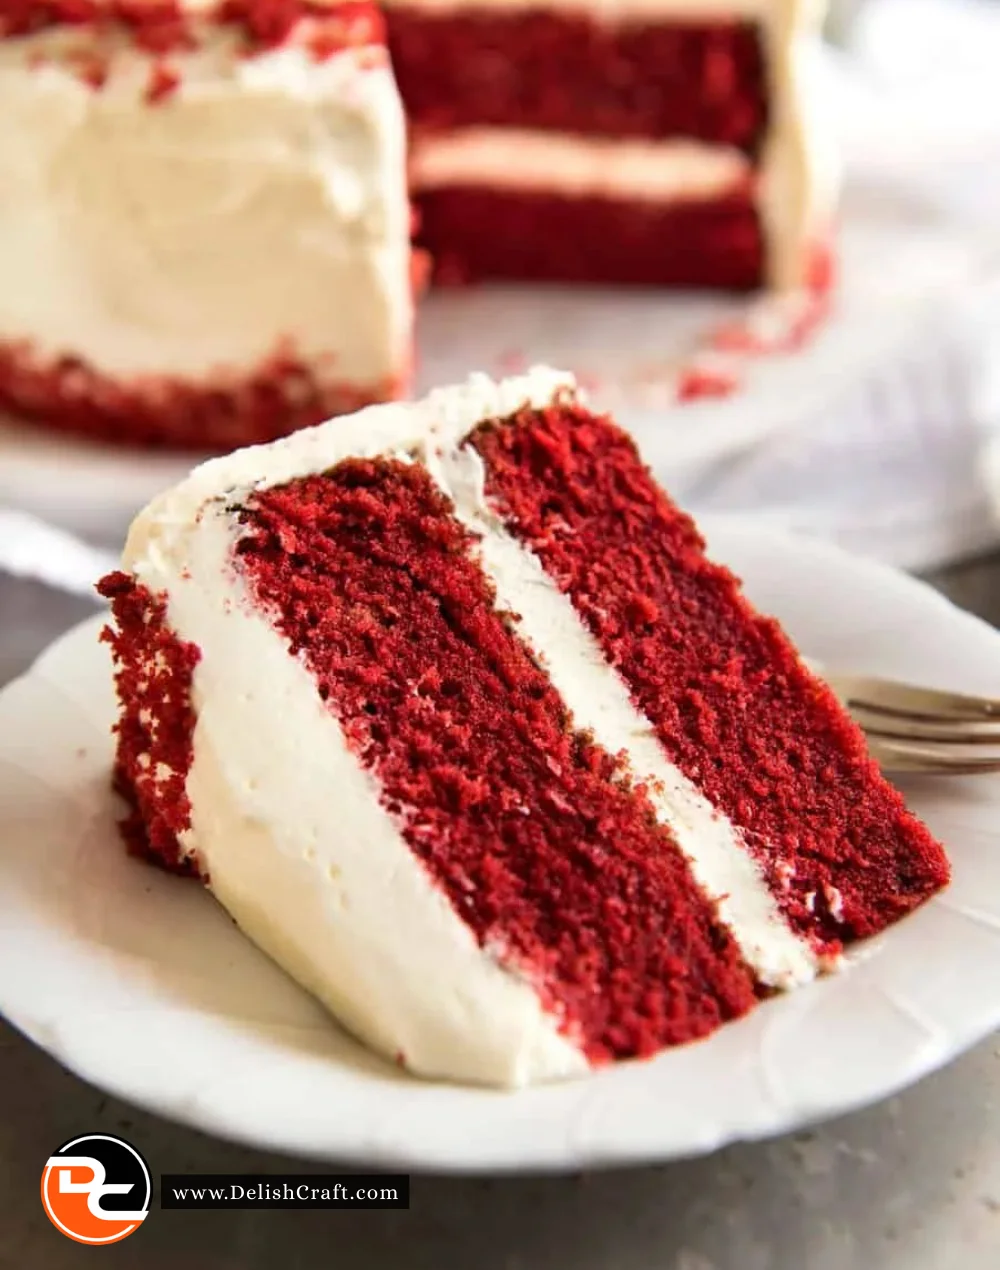
When I think of the perfect cake, one that has graced tables for birthdays, anniversaries, and every sweet celebration in between, my mind immediately drifts to the awe-inspiring Red Velvet Cake. This cake isn’t just a feast for the eyes; its signature rich red hue and its soft, velvety texture create a memorable culinary experience. Each slice offers a sweet, slightly tangy flavor profile that captivates everyone lucky enough to indulge. But my fondness for this dessert runs deeper than mere aesthetics or taste; it’s tangled in cherished memories.
I remember the first time I made Red Velvet Cake from scratch. The kitchen was filled with the comforting aroma of vanilla and cocoa as I watched the vibrant red batter swirl in the mixing bowl, my heart fluttering each time I turned on the mixer. From that moment forward, it became a staple in my baking repertoire, a recipe that never failed to wow my friends and family. Today, I want to share with you not just the recipe for this beloved cake but the love and connection that comes with every slice.
Recipe Timing
- Prep Duration: 20 minutes
- Active Cooking: 30 minutes
- Total Duration: 50 minutes
- Portion Size: 12 servings
- Complexity: Simple
Nutritional Recipe
- Calories per portion: Approximately 360 calories
- Protein: 3 grams
- Carbs: 56 grams
- Fats: 14 grams
- Fiber: 1 gram
- Sugars: 30 grams
- Sodium: 350 mg
Why You’ll Love This Red Velvet Cake
The Red Velvet Cake isn’t just beautiful; it’s a textural dream! Moist, with a perfect crumb, it’s layered with creamy, tangy cream cheese frosting that contrasts elegantly against the soft cake. This dessert makes a statement, whether you’re serving it at a grand celebration or simply enjoying a slice on a quiet afternoon. It’s that perfect balance of flavors that leaves you wanting more and evokes feelings of warmth, nostalgia, and joy.
The Complete Cooking Journey
Making this Red Velvet Cake is not only about following the recipe; it’s about the experience. From mixing the rich batter to watching the cakes rise perfectly in the oven to the lovely moment when you take the first slice, each step contributes to a beautiful culinary journey. Let me guide you on this delicious adventure!
Ingredients:
- 2 1/2 cups all-purpose flour
- 1 1/2 cups sugar
- 1 teaspoon baking soda
- 1 teaspoon salt
- 1 teaspoon cocoa powder
- 1 1/2 cups vegetable oil
- 1 cup buttermilk, room temperature
- 2 large eggs, room temperature
- 2 tablespoons red food coloring
- 1 teaspoon vanilla extract
- 1 teaspoon white vinegar
Method:
Step 1: Preheat the Oven
Preheat the oven to 350°F (175°C). Grease and flour two 9-inch round cake pans, ensuring they are well-prepared for the luscious batter.
Step 2: Combine Dry Ingredients
In a large bowl, whisk together the flour, sugar, baking soda, salt, and cocoa powder. This blend will form the structure and sweetness of your cake.
Step 3: Mix Wet Ingredients
In another bowl, mix the vegetable oil, buttermilk, eggs, red food coloring, vanilla extract, and vinegar until well combined. The vibrant red hue should begin to shine through!
Step 4: Combine Dry and Wet Ingredients
Gradually add the dry ingredients to the wet ingredients, mixing until just combined. Be careful not to overmix; we want that lovely, tender crumb!
Step 5: Divide the Batter
Evenly divide the batter between the prepared pans, giving each cake an equal share of that delightfully rich mixture.
Step 6: Bake to Perfection
Bake in the preheated oven for 25-30 minutes, until a toothpick inserted in the center comes out clean. The kitchen will soon be filled with an irresistible aroma.
Step 7: Cool the Cakes
Let the cakes cool in the pans for about 10 minutes. Then, gently turn them out onto wire racks to cool completely. The anticipation is half the fun!
Step 8: Frost with Love
Once the cakes have cooled completely, frost them generously with cream cheese frosting. Take a moment to admire your handiwork—it’s a sight to behold!
Serving Suggestions & Pairings
Serve slices of your beautiful Red Velvet Cake with a dollop of whipped cream or alongside a scoop of vanilla ice cream for an extra indulgence. Pair it with a steaming cup of coffee or a glass of chilled milk; both are delightful companions to this scrumptious dessert!
Storage & Leftovers Guide
Store leftover cake in an airtight container in the refrigerator for up to 5 days. You can also freeze the cake layers (wrapped tightly) for up to 2 months; just be sure to let them thaw in the refrigerator before frosting.
Kitchen Wisdom & Success Tips
- Ensure your ingredients are at room temperature; this will help create an even batter.
- Don’t skip the vinegar—it reacts with the baking soda to create that perfect rise and moisture.
- Use gel food coloring for a more vibrant red.
- If you want a less sweet frosting, consider mixing in some sour cream for balance.
Flavor Variations & Adaptations
For a twist, consider adding a hint of almond extract to the batter or some finely grated orange zest for a refreshing citrus touch. You could even swap the cream cheese frosting for chocolate ganache if you’re feeling adventurous!
Reader Questions & Solutions
-
Can I use regular milk instead of buttermilk?
Absolutely! If you don’t have buttermilk, you can make your own by adding 1 tablespoon of vinegar or lemon juice to regular milk and letting it sit for 5-10 minutes. -
How do I know when the cake is done baking?
A toothpick inserted into the center of the cake should come out clean or with a few moist crumbs attached, but not wet batter. -
Can I make this cake in advance?
Yes, make the cake layers ahead of time. Wrap them tightly once cooled and refrigerate or freeze until needed. -
What if my cake sinks in the middle?
This could be due to overmixing the batter or a too-hot oven. Always bake on the middle rack and check your oven’s temperature with an oven thermometer. -
How can I make this gluten-free?
Substitute the all-purpose flour with a 1:1 gluten-free baking flour blend, ensuring it contains xanthan gum for structure.
Wrapping Up
Baking a Red Velvet Cake is not just about creating something delicious—it’s about conjuring memories and celebrating the moments that matter. With its stunning color and delightful flavor, this cake will surely become a cherished part of your culinary adventures. So preheat that oven, grab your mixing bowls, and let’s bake a cake that brings joy and sweetness into our lives! Happy baking!
Print
Red Velvet Cake
- Total Time: 50 minutes
- Yield: 12 servings 1x
- Diet: Vegetarian
Description
A stunning Red Velvet Cake with a rich hue and velvety texture, topped with tangy cream cheese frosting.
Ingredients
- 2 1/2 cups all-purpose flour
- 1 1/2 cups sugar
- 1 teaspoon baking soda
- 1 teaspoon salt
- 1 teaspoon cocoa powder
- 1 1/2 cups vegetable oil
- 1 cup buttermilk, room temperature
- 2 large eggs, room temperature
- 2 tablespoons red food coloring
- 1 teaspoon vanilla extract
- 1 teaspoon white vinegar
Instructions
- Preheat the oven to 350°F (175°C) and prepare two 9-inch round cake pans.
- In a large bowl, whisk together the flour, sugar, baking soda, salt, and cocoa powder.
- In another bowl, mix the vegetable oil, buttermilk, eggs, red food coloring, vanilla extract, and vinegar.
- Gradually add the dry ingredients to the wet ingredients, mixing until just combined.
- Evenly divide the batter between the prepared pans.
- Bake in the preheated oven for 25-30 minutes or until a toothpick comes out clean.
- Let the cakes cool in the pans for 10 minutes, then turn them out onto wire racks to cool completely.
- Once cooled, frost with cream cheese frosting.
Notes
Use gel food coloring for a vibrant red color. Ensure ingredients are at room temperature for an even batter.
- Prep Time: 20 minutes
- Cook Time: 30 minutes
- Category: Dessert
- Method: Baking
- Cuisine: American
Nutrition
- Serving Size: 1 slice
- Calories: 360
- Sugar: 30g
- Sodium: 350mg
- Fat: 14g
- Saturated Fat: 2g
- Unsaturated Fat: 12g
- Trans Fat: 0g
- Carbohydrates: 56g
- Fiber: 1g
- Protein: 3g
- Cholesterol: 30mg