No Bake Turtle Mini Cheesecake
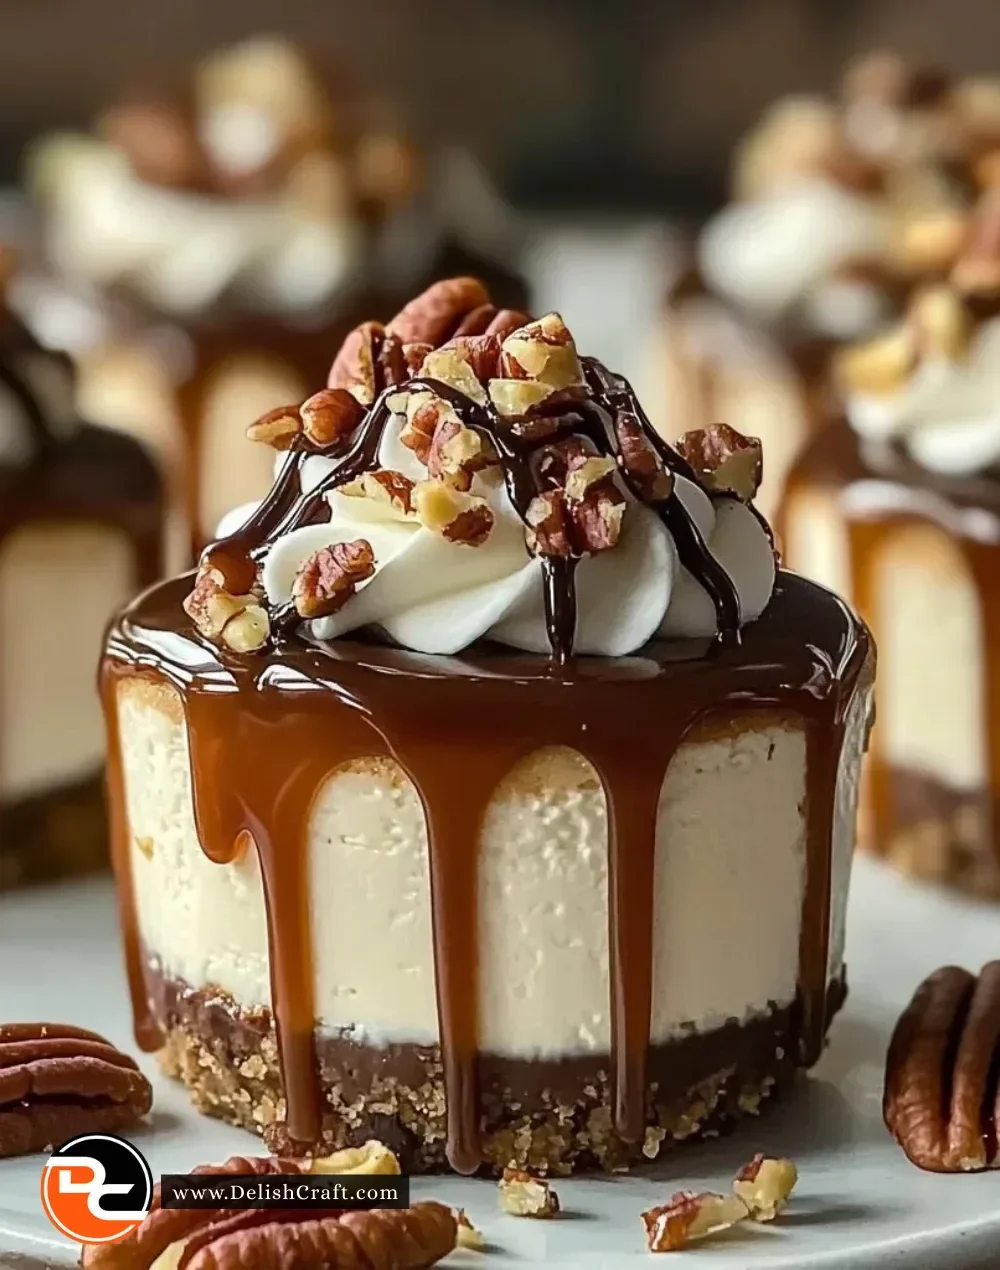
No Bake Turtle Mini Cheesecakes are the perfect sweet treat for any occasion, combining the creamy richness of cheesecake with the indulgent flavors of caramel, chocolate, and toasted pecans. Not only are they a delightful dessert, but they’re also incredibly simple to make. You can whip up these delightful mini cheesecakes without ever having to turn on your oven, making them ideal for hot summer days or when you want something sweet without the hassle of baking.
Recipe Information
- Prep Time: 20 minutes
- Cook Time: 0 minutes
- Total Time: 4 hours 20 minutes (includes cooling time)
- Servings: 12 mini cheesecakes
- Difficulty Level: Easy
Nutrition Information
- Calories per serving: 340
- Protein: 4g
- Carbohydrates: 36g
- Fat: 22g
- Fiber: 0g
- Sugar: 18g
- Sodium: 180mg
Why Make This No Bake Turtle Mini Cheesecake
These No Bake Turtle Mini Cheesecakes are not just easy to prepare—they’re also a crowd-pleaser! The creamy filling balances perfectly with the crunchy graham cracker crust, while the swirl of caramel and chocolate adds a decadent touch. Each bite offers a delightful combination of textures and flavors, making them a cherished favorite at any gathering. Plus, they look impressive when served, making you appear like a skilled baker without spending countless hours in the kitchen.
How to Make No Bake Turtle Mini Cheesecake
Creating these mini cheesecakes is a breeze and requires minimal equipment. All it takes is a mixing bowl, some measuring cups, and muffin tins or mini cheesecake cups. Follow these simple steps to create a delightful dessert everyone will love.
Ingredients:
- 1 1/2 cups graham cracker crumbs
- 1/3 cup sugar
- 1/2 cup unsalted butter, melted
- 2 cups cream cheese, softened
- 1 cup powdered sugar
- 1 teaspoon vanilla extract
- 1 cup whipped cream
- 1/2 cup caramel sauce
- 1/2 cup chocolate sauce
- Chopped pecans for topping
Directions:
-
Step 1: Preparation
In a mixing bowl, combine graham cracker crumbs, sugar, and melted butter. Mix until well combined, forming a sandy texture.
-
Step 2: Crust Formation
Press the mixture firmly into the bottoms of mini cheesecake cups or muffin tins to create a stable crust.
-
Step 3: Cream Cheese Mixture
In another bowl, beat the cream cheese until smooth. Gradually add the powdered sugar and vanilla extract, mixing until well combined and creamy.
-
Step 4: Incorporating Whipped Cream
Gently fold in the whipped cream until fully incorporated into the cream cheese mixture, ensuring a light and fluffy texture.
-
Step 5: Filling the Cups
Spoon the cream cheese mixture over the prepared crusts, filling each cup equally.
-
Step 6: Drizzling Sauces
Drizzle caramel and chocolate sauce over the top of each cheesecake, creating a beautiful and tempting presentation.
-
Step 7: Adding Pecans
Sprinkle chopped pecans on top as a delicious garnish, adding crunch and flavor.
-
Step 8: Setting in the Refrigerator
Refrigerate for at least 4 hours or until firm to the touch, allowing the flavors to meld together beautifully.
-
Step 9: Serving
Serve chilled, and enjoy your mini cheesecakes!
How to Serve No Bake Turtle Mini Cheesecake
These mini cheesecakes shine at any gathering! Serve them on a decorative platter for special occasions, or place them in individual cups for a casual get-together. Pair them with a scoop of vanilla ice cream or a dollop of extra whipped cream for an extra treat. They also make a wonderful dessert for holiday dinners, birthday parties, or family gatherings.
How to Store No Bake Turtle Mini Cheesecake
To keep your No Bake Turtle Mini Cheesecakes fresh, store them in an airtight container in the refrigerator. They will last for up to 5 days. If you need to prepare them in advance, consider making them a day or two before your event. Unfortunately, these cheesecakes do not freeze well due to their creamy texture.
Expert Tips for Perfect No Bake Turtle Mini Cheesecake
- Ensure your cream cheese is at room temperature for a smoother mixture—this will help avoid lumps.
- If you want a richer flavor, try substituting half the whipped cream with sour cream.
- For an extra chocolate kick, consider adding chocolate chips to the cream cheese mixture.
- When pressing the crust mixture into the cups, use the bottom of a flat glass to create an even and firm base.
- Let the cheesecakes chill overnight for the best firm texture.
Delicious Variations
- Fruit Twist: Add pureed strawberries or raspberries to the cream cheese mixture for a fruity version.
- Nutty Delight: Swap chopped pecans for walnuts or almonds, or mix in some crushed cookies for additional crunch.
- Lightened Up: Use low-fat cream cheese and light whipped cream for a healthier option without sacrificing flavor.
Frequently Asked Questions
-
Can I use different types of nuts?
Yes! Feel free to use walnuts or even crushed almonds instead of pecans. -
How can I make these gluten-free?
Use gluten-free graham cracker crumbs and ensure all other ingredients are gluten-free certified. -
Is it necessary to use both caramel and chocolate sauce?
While both sauces create a delicious combination, you can opt for just one depending on your taste preference. -
Can I make these mini cheesecakes dairy-free?
Yes! Substitute cream cheese with a dairy-free cream cheese alternative and use non-dairy whipped cream. -
What do I do if I don’t have mini cheesecake cups?
You can use a regular muffin tin lined with paper liners or any small serving cups you have on hand.
Conclusion
No Bake Turtle Mini Cheesecakes are an effortless way to impress your friends and family with a delectable dessert that’s sure to satisfy any sweet tooth. They combine creamy cheesecake with rich sauces and crunchy nuts in a delightful mini form that’s perfect for sharing. So go ahead and try this easy recipe at your next gathering—you won’t be disappointed! Happy baking!